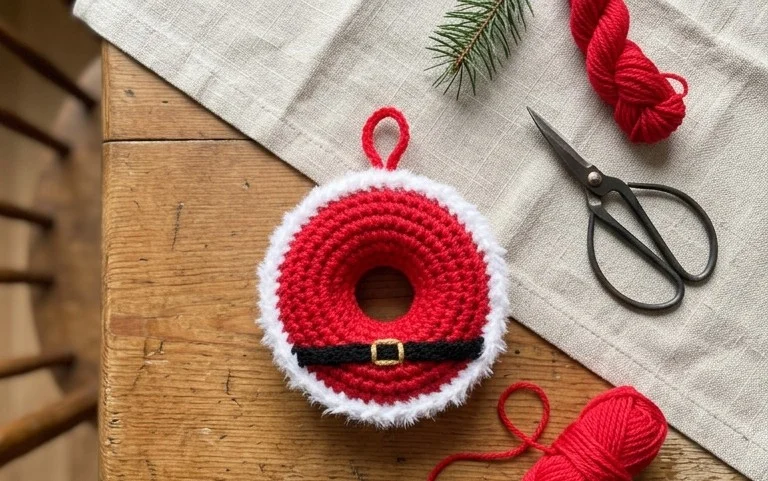
This little Santa Donut ornament, crocheted with a creamy beige and pops of red and white, looks good enough to eat but is meant to hang on your tree. It’s a fun project that brings together the simple shape of a donut with Santa’s jolly hat and beard. This makes it a really cheerful addition to your holiday decor, perfect for stuffing into stockings, or giving as a small, handmade gift. It’s also a great project if you’re just getting started with amigurumi because the shapes are basic and it works up fairly quickly. In this pattern, we’ll walk you through creating each part, from the donut base to Santa’s rosy cheeks and fluffy beard, ensuring your ornament turns out just right.
Amigurumi Santa Donut Ornament: A Sweet Holiday Crochet Project
This Amigurumi Santa Donut Ornament is a charming little project that brings a festive and edible-looking feel to your holiday decorations. It’s a sweet treat for your tree, a delightful stocking stuffer, or even a fun small gift for a fellow crafter. The design cleverly combines the simple shape of a donut with the iconic elements of Santa Claus, making for an instantly recognizable and cheerful ornament.
Yarn and Hook Recommendations
For this Santa Donut, you’ll want yarns that give good stitch definition and a slightly plush feel, perfect for amigurumi. Worsted weight yarn is generally a great choice for amigurumi because it’s not too thin to work with and not too thick that your stitches get lost. Acrylic yarn is a fantastic option for beginners and for ornaments that might get handled a bit. It’s durable, washable, and comes in a huge range of colors. For the donut base, a creamy beige or light brown works wonderfully, mimicking a classic fried dough. For Santa’s hat and beard, a classic red and white are essential. Black and a flesh tone or light brown for Santa’s face complete the color palette.
When it comes to hooks, a size that complements your yarn is key. For most worsted weight yarns, a hook size between E/4 (3.5mm) and G/6 (4.0mm) is a good starting point. The goal with amigurumi is to crochet tightly so that the stuffing doesn’t show through the stitches. You might find you need to go down a hook size from what the yarn label recommends. It’s always a good idea to crochet a small swatch with your chosen yarn and hook to check the fabric density. You want it to be firm and hold its shape.
Stitch Techniques Used
This pattern relies on a few fundamental crochet techniques that are standard for amigurumi. If you’re new to amigurumi, these are the stitches you’ll want to get comfortable with:
- Magic Ring (or Magic Circle): This is the foundation for most amigurumi pieces. It creates a tight, adjustable starting circle that prevents any holes in the center of your work, which is essential for toys and ornaments.
- Single Crochet (sc): This is the most common stitch in amigurumi. It creates a dense fabric when worked in continuous rounds.
- Increasing (inc): To make your piece grow, you’ll work two single crochets into the same stitch. This is usually done evenly around a round to create a flat circle or expand a shape.
- Decreasing (dec): To make your piece smaller and shape it, you’ll work two stitches together as one. The most common method is the “invisible decrease,” where you crochet through the front loops only of the next two stitches. This creates a neater finish than a standard decrease.
- Slip Stitch (sl st): Used to join rounds or to move your yarn without adding height.
- Working in continuous rounds: Amigurumi is typically worked in a spiral rather than joining each round with a slip stitch and turning. This is where a stitch marker becomes indispensable.
Tips for Beginners
If you’re just starting out with crochet or amigurumi, this Santa Donut is an excellent project to build your confidence. Here are a few tips to make your experience smoother:
- Use a Stitch Marker: This is non-negotiable for amigurumi worked in continuous rounds. Place a marker in the first stitch of each round to know where your round begins and ends. As you get more experienced, you might not need it as much, but for your first few projects, it’s a lifesaver.
- Stuff as You Go: Don’t wait until the very end to add stuffing. Stuff the piece gradually as you crochet the rounds. This makes it much easier to get an even stuffing and avoids leaving large, un-stuffed sections. Use small amounts of stuffing at a time.
- Stuff Firmly but Not Too Tightly: You want the ornament to feel solid and hold its shape, but avoid stuffing so tightly that the stitches stretch out and you can see the stuffing peeking through.
- Count Your Stitches: It’s easy to miss stitches or accidentally add extra ones when you’re learning. Take the time to count your stitches at the end of each round, especially after increases and decreases, to ensure your piece is turning out correctly.
- Practice the Magic Ring: If you’re unfamiliar with the magic ring, watch a few video tutorials. It can be a bit fiddly at first, but once you get the hang of it, it’s incredibly useful.
- Don’t Be Afraid to Undo: Everyone makes mistakes! If you realize you’ve made an error a few rounds back, it’s often easier to gently pull out your stitches and start again than to try and fix it later.
How to Customize
This Santa Donut pattern is wonderfully adaptable. Don’t feel confined to the exact colors or details. Here are some ideas for making it your own:
- Colors:
- Donut Base: Instead of beige, try a soft pink for a strawberry donut, a mint green for a mint-flavored one, or even a chocolate brown.
- Frosting: While this pattern doesn’t include frosting, you could easily add a simple round or two of white or pink single crochet worked into the back loops of the top of the donut for a “frosted” look.
- Santa’s Hat: Experiment with different shades of red or even a striped hat.
- Santa’s Face: A light brown can be used for a gingerbread man twist, or even a pale grey for a “snowman donut.”
- Sizes: The size of your finished ornament is primarily determined by the yarn weight and hook size you use. Using a finer weight yarn (like sport weight or DK) with a smaller hook will result in a smaller ornament. Conversely, using a bulkier yarn (like bulky or super bulky) with a larger hook will create a larger, more huggable donut. You can also adjust the number of rounds you crochet for the donut’s body to make it taller or shorter.
- Add Details: Consider adding a tiny sprinkle detail with embroidery floss in contrasting colors on the donut’s “frosting” or “dough.” You could also embroider a small smile onto Santa’s face.
Care Instructions for the Finished Piece
Since this is an ornament, it likely won’t need frequent washing. However, acrylic yarn is generally quite durable and easy to care for. If your ornament does get a bit dusty or dirty:
- Spot Cleaning: For minor marks, use a damp cloth with a tiny bit of mild soap. Gently dab the affected area and allow it to air dry completely.
- Hand Washing: If a more thorough cleaning is needed, hand wash the ornament in cool water with a mild detergent. Do not wring or twist it, as this can distort the shape. Gently squeeze out excess water.
- Drying: Reshape the ornament while it’s damp and lay it flat on a clean, dry towel. Allow it to air dry completely away from direct heat or sunlight, which can cause colors to fade.
- Avoid Machine Washing/Drying: While acrylic can withstand machine washing, the stuffing and shape of an amigurumi ornament can be compromised in a washing machine and especially a dryer.
Project Ideas
This adorable Santa Donut ornament has so many uses beyond just hanging on a Christmas tree:
- Tree Decorations: The most obvious use! Make a set of them in various colors for a fun and playful tree.
- Gift Toppers: Tie one onto the ribbon of a wrapped gift for a sweet, handmade touch.
- Stocking Stuffers: These are small, light, and inexpensive to make, making them perfect little surprises for Christmas stockings.
- Party Favors: Hand them out at a holiday party as a memento.
- Wreath Embellishments: Use them to decorate a DIY Christmas wreath.
- Garland: String several together with yarn or ribbon to create a festive garland.
- Play Food for Dolls: If made with very securely attached safety eyes (or embroidered eyes), they can be fun additions to a doll’s play kitchen.
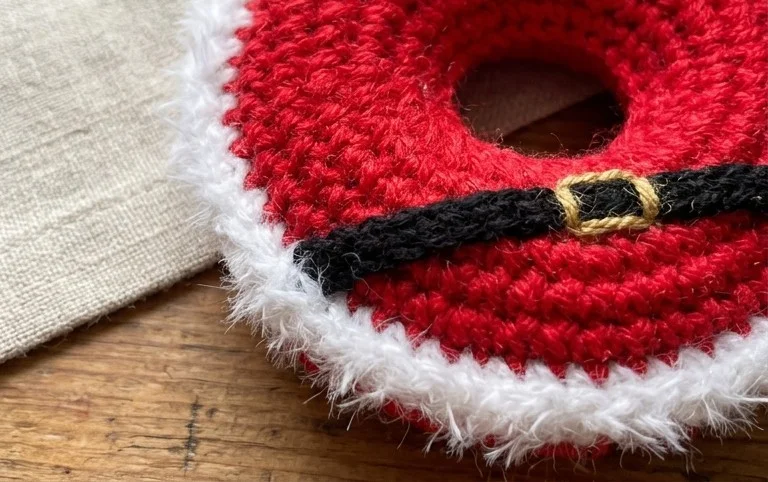
I hope you enjoyed crocheting this sweet Amigurumi Santa Donut Ornament. It’s always rewarding to see a pile of yarn transform into something so festive and cute. Don’t be afraid to get creative with your Santa Donuts! Maybe try a different color donut base, or add a tiny sprig of holly. If you share your finished ornaments on social media, please tag me – I’d love to see them! You can find more holiday crochet patterns right here on the blog, perfect for filling your home with handmade cheer.