The yarn settles into the hook, creating a satisfying rhythm as a classic Halloween silhouette begins to take shape. This crochet witch hat pattern is like that first cool breeze of autumn—familiar, a little bit magical, and promising fun. It works up surprisingly quickly, making it a great project for a weekend, and the result is a hat with a nice structure, especially in the cone, so it stands up tall and proud. Whether you’re looking to complete a spooky costume, add a charming touch to your home decor for the season, or create a thoughtful handmade gift, this pattern is designed to be approachable. Even if you’re still getting the hang of crochet stitches, you’ll find the instructions clear and straightforward. We’ll cover everything from choosing the right yarn and hook to getting that brim just right.
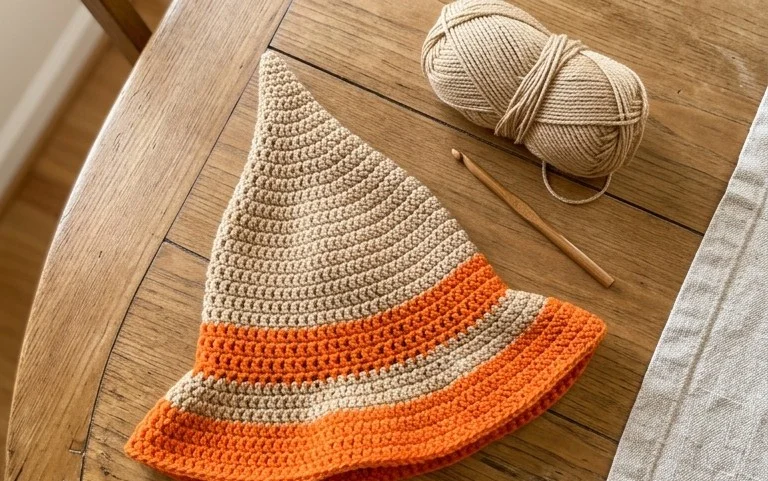
The Magic of a Handmade Halloween Witch Hat
There’s something uniquely charming about a handmade witch hat. It’s more than just a costume accessory; it’s a statement piece that brings a touch of whimsy and a dash of mystery to any Halloween celebration. This crochet pattern allows you to craft your very own, a perfect project for both seasoned crocheters and those just dipping their toes into the yarn world.
Yarn and Hook Recommendations
For this witch hat, we’re aiming for a hat that has some body and holds its shape, especially the cone. A medium-weight yarn, often labeled as worsted weight or Aran weight, is your best bet. Acrylic yarns are fantastic for this project because they’re readily available in a vast array of colors, they’re durable, easy to care for, and they tend to hold their shape well after blocking, which is key for a good hat brim.
Black is the classic witch hat color, of course, but don’t be afraid to explore deep purples, emerald greens, or even a spooky grey. For the band and any decorative elements, you might want a contrasting color. Consider a vibrant orange, a ghostly white, or a metallic gold or silver for a touch of magic.
The hook size will depend on your yarn choice and your personal tension. Generally, for worsted weight yarn, a 5.0 mm (H/8) or 5.5 mm (I/9) crochet hook works well. You want a hook that allows your stitches to be relatively firm without being so tight that it’s difficult to work with. If you tend to crochet tightly, you might need a slightly larger hook. Conversely, if your stitches are loose, go down a hook size. It’s always a good idea to make a small test swatch with your chosen yarn and hook to ensure you achieve the desired fabric density.
Essential Crochet Techniques
This pattern primarily relies on a few fundamental crochet stitches that make it accessible for beginners. The foundation of the hat is built using the magic ring (also known as a magic circle). This technique creates a tight, closed center for the top of your hat, avoiding any unsightly holes. If you’re new to this, there are many great video tutorials available online that demonstrate it step-by-step.
The main body of the hat is worked in rounds using single crochet (sc) stitches. This is a basic, sturdy stitch that creates a dense fabric perfect for holding the hat’s shape. You’ll also be incorporating increases, which are stitches worked into the same stitch or space to gradually widen the circumference of your work as you build the cone of the hat.
To create the brim, we’ll likely use double crochet (dc) stitches. This taller stitch will create a wider, more dramatic brim that can be stiffened if desired. You might also use a combination of stitches for the brim, or even a specialized edging technique for a unique finish.
Here’s a quick rundown of the stitches you’ll encounter:
- Magic Ring: Creates a closed, adjustable loop to start rounds.
- Single Crochet (sc): A basic, dense stitch.
- Increase (inc): Two stitches worked into the same stitch to expand the fabric.
- Double Crochet (dc): A taller stitch used for the brim.
Tips for Beginners
If you’re new to crochet, don’t let this project intimidate you! The witch hat is an excellent way to practice and build confidence. The most important thing is to practice your tension and learn to read a pattern. Make a small swatch with your chosen yarn and hook to get a feel for the stitch gauge.
- Read the Pattern Carefully: Before you even pick up your hook, read the entire pattern through. Familiarize yourself with the terms and the order of operations.
- Use Stitch Markers: Especially when working in the round, stitch markers are your best friend. Use one to mark the beginning of each round so you know exactly where to join or stop.
- Don’t Be Afraid to Undo: We all make mistakes! If you notice an error a few rows back, it’s usually easier to frog (undo) your work and fix it than to try and fudge it.
- Consistent Tension: Try to maintain consistent tension throughout your project. This will ensure your stitches look uniform and your hat has a nice, even shape.
- Watch Video Tutorials: If you’re unsure about a specific stitch or technique, like the magic ring, search for video tutorials online. Seeing it done can make all the difference.
Customizing Your Witch Hat
The beauty of crochet is its incredible customizability. This witch hat pattern is a fantastic base for your own creative flair.
Colors:
Beyond the classic black, think about different color combinations. You could make a striped hat by changing colors every few rounds. A gradient yarn would create a stunning effect. For a child’s hat, bright, cheerful colors might be more appealing than traditional dark shades.
Sizes:
This pattern can be adjusted for different sizes. The key is to control the number of increases. If you want a larger hat, you’ll continue the increase section for more rounds. If you need a smaller hat, you’ll stop the increase section sooner. The brim circumference will also need to be adjusted accordingly to maintain proportional balance.
Embellishments:
This is where you can really have fun! Consider adding a decorative band around the base of the cone. You could crochet a separate band in a contrasting color or use ribbon or fabric. Other embellishment ideas include:
- Crocheted flowers or leaves
- Buttons
- Appliquéd felt shapes (like stars or moons)
- A few strategically placed beads
- A buckle made from a different colored yarn
Care Instructions for Your Finished Hat
Once your witch hat is complete, proper care will ensure it stays looking magical for Halloweens to come.
Most acrylic yarns are machine washable. Check the yarn label for specific instructions. Typically, you can wash your hat on a gentle cycle in cool water with mild detergent. Avoid using fabric softeners, as they can coat the fibers and make them less grippy, which isn’t ideal for crochet items.
Drying is best done by laying the hat flat on a clean towel, reshaping it gently while it’s still damp. Avoid hanging it to dry, as the weight of the water can stretch out the stitches and distort the shape. If you need to stiffen the brim for a particularly dramatic look, you can use a fabric stiffener spray, following the product’s instructions carefully.
Project Ideas
This witch hat pattern is wonderfully versatile:
- Costume Accessory: The most obvious, of course! It’s perfect for your own Halloween costume or for kids.
- Party Decorations: Imagine a collection of these hats hanging from the ceiling or as table centerpieces at a Halloween party. You could make them in various sizes.
- Seasonal Decor: Even after Halloween, a well-made witch hat can add a cozy, autumnal touch to your home decor.
- Gift Giving: A handmade witch hat is a thoughtful and unique gift for any crafty friend or a child who loves dress-up.
- Photography Prop: These hats make adorable props for fall-themed photoshoots, especially for babies and young children.
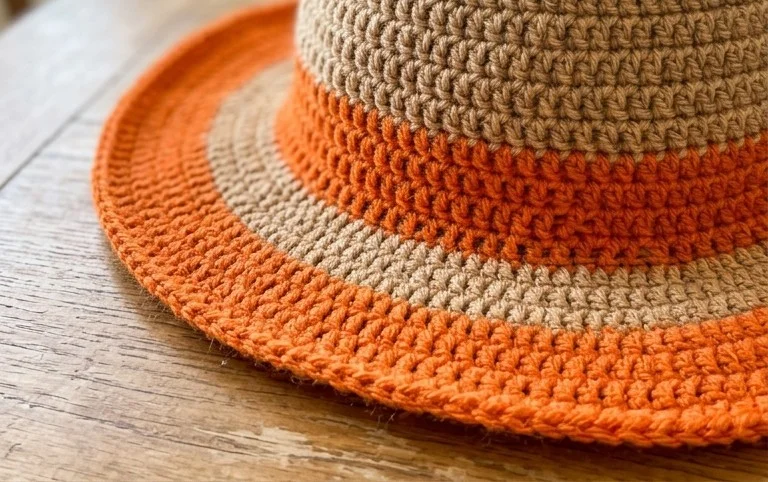
You’ve made a wonderful Halloween witch hat! Seeing that cone stand tall and the brim lay flat is a great feeling. Don’t hesitate to play with colors – maybe a deep jewel tone or even stripes? You could add a band in a contrasting color, stitch on some sparkly stars, or even attach a little crocheted spider. If you share your finished hat online, tag us so we can see your creation! We love seeing how our patterns come to life. Keep your hook busy and your yarn stash happy; there are always more projects waiting.