A plump little crochet pumpkin is one of the first fall decorations I reach for. They work up so fast, you can have a whole patch ready for your mantelpiece or entryway before the first crisp autumn leaf even falls. This pattern is designed to be straightforward, using basic stitches so even if you’ve only just learned how to chain and single crochet, you’ll be able to make these adorable pumpkins. Yarn and Hook Recommendations For this pumpkin pattern, you’ll want to use a yarn that has a bit of weight and structure. Worsted weight yarn is perfect. It’s commonly available in acrylic, wool, or cotton blends, and most craft stores have a huge selection of colors. For the classic pumpkin look, shades of orange are obvious choices, but don’t be afraid to try cream, white, dusty rose, or even a deep green or purple for a unique twist. A yard or two of brown or dark green yarn is also needed for the stem. When it comes to hooks, a size H-8 (5.0 mm) crochet hook is a good starting point for most worsted weight yarns. This size hook will give you a nice, firm fabric that holds its shape well, which is important for a plump pumpkin. You can adjust your hook size slightly if your gauge is too loose or too tight. If your stitches are very loose and floppy, try a smaller hook, like a G-6 (4.0 mm). If your fabric feels too stiff and difficult to work with, go up to an I-9 (5.5 mm). Stitch Techniques Used This pattern relies on just a few fundamental crochet stitches: single crochet (sc), and increases (inc). You’ll also be working in continuous rounds, meaning no joining at the end of each round. This technique creates a seamless look, much like traditional amigurumi. We’ll also use the magic ring (or magic circle) for a tidy start, but don’t worry if that sounds intimidating. I’ll explain it step-by-step, and you can always substitute it with a chain 2 start if you prefer. The stem is created by working a few rows of single crochet in a darker yarn. You’ll need to know how to do a basic slip knot, how to hold your yarn and hook, and how to make a slip stitch to fasten off. That’s it! You’re ready to create your first crochet pumpkin.
Quick and Easy Crochet Pumpkin Pattern for Beginners
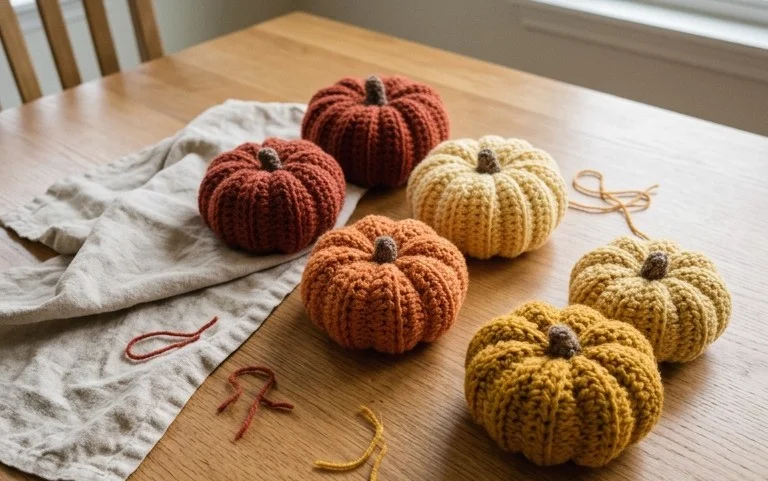
A plump little crochet pumpkin is one of the first fall decorations I reach for. They work up so fast, you can have a whole patch ready for your mantelpiece or entryway before the first crisp autumn leaf even falls. This pattern is designed to be straightforward, using basic stitches so even if you’ve only just learned how to chain and single crochet, you’ll be able to make these adorable pumpkins.
Yarn and Hook Recommendations
For this pumpkin pattern, you’ll want to use a yarn that has a bit of weight and structure. Worsted weight yarn is perfect. It’s commonly available in acrylic, wool, or cotton blends, and most craft stores have a huge selection of colors. For the classic pumpkin look, shades of orange are obvious choices, but don’t be afraid to try cream, white, dusty rose, or even a deep green or purple for a unique twist. A yard or two of brown or dark green yarn is also needed for the stem.
When it comes to hooks, a size H-8 (5.0 mm) crochet hook is a good starting point for most worsted weight yarns. This size hook will give you a nice, firm fabric that holds its shape well, which is important for a plump pumpkin. You can adjust your hook size slightly if your gauge is too loose or too tight. If your stitches are very loose and floppy, try a smaller hook, like a G-6 (4.0 mm). If your fabric feels too stiff and difficult to work with, go up to an I-9 (5.5 mm).
Stitch Techniques Used
This pattern relies on just a few fundamental crochet stitches. If you can make a slip knot, chain stitch, and single crochet, you’re ready to go! Here’s a quick breakdown:
- Chain Stitch (ch): This is the foundation of most crochet projects. You’ll create a series of loops on your hook.
- Single Crochet (sc): This is the most basic crochet stitch, creating a dense, solid fabric. You insert your hook into a stitch, yarn over, pull up a loop, yarn over, and pull through both loops on your hook.
- Slip Stitch (sl st): Used for joining rounds and finishing off. You insert your hook, yarn over, and pull through the stitch and the loop on your hook in one motion.
- Magic Ring (optional but recommended): This creates a tight, closed center for your pumpkin. If you find the magic ring a bit tricky at first, don’t worry. You can also start by chaining 2 and working your first round of single crochets into the second chain from the hook.
Tips for Beginners
Don’t be discouraged if your first few stitches aren’t perfectly even. That’s completely normal when you’re starting out. Here are some tips to make your pumpkin-making experience smoother:
- Hold your yarn consistently: Try to keep the tension on your yarn even. Some people hold the yarn in their left hand, others in their right. Experiment to see what feels most comfortable and consistent for you.
- Count your stitches: It’s easy to accidentally add or skip stitches, especially in the early rounds. Place a stitch marker in the first stitch of each round to help you keep track.
- Don’t pull too tight: While a firm fabric is good, pulling your stitches too tight can make it difficult to insert your hook into the stitches in subsequent rounds.
- Practice the stitches first: Before diving into the pumpkin, make a small swatch using just single crochet to get a feel for the tension and how the stitches look.
- Don’t be afraid to frog it: “Frogging” is crochet lingo for unraveling your work. If you make a mistake you can’t fix, it’s better to pull it back and start again than to have a wonky pumpkin.
How to Customize
The beauty of this pattern is how easy it is to adapt. You can make pumpkins of all shapes and sizes!
Sizes
To make a smaller pumpkin, simply work fewer increase rounds or start with a smaller starting chain if you’re not using a magic ring. For a larger pumpkin, add one or two more rounds of increases and subsequent single crochet rounds. The circumference will grow with each added round.
Colors
Experiment with different color combinations! A variegated yarn can create a unique, marbled effect. Try a black pumpkin for a spooky Halloween vibe, or a pastel shade for a more whimsical feel. You can also add stripes by changing colors every few rounds.
Stems and Leaves
The stem is made by crocheting a small rectangle and sewing it closed, or by working a few rounds of single crochet in the round to create a tube. For an extra touch, you can crochet a simple leaf using green yarn and attach it to the stem.
Care Instructions
Once your adorable pumpkins are finished, caring for them is simple. Most acrylic or cotton yarns can be hand-washed in cool water with a mild detergent. Gently squeeze out excess water (don’t wring them!) and lay them flat to dry, reshaping them as needed. If you’ve used a wool blend, it’s best to hand wash or spot clean only to prevent felting.
Project Ideas
These quick and easy crochet pumpkins are incredibly versatile. Here are a few ideas to get your creativity flowing:
- Seasonal Decor: Arrange a collection of them on your mantel, coffee table, or shelf. They add instant warmth and autumn charm.
- Bowl Fillers: Place them in a decorative bowl for a charming centerpiece.
- Gift Toppers: Sewn onto a gift bag or tied around a present, they make for a handmade and thoughtful touch.
- Play Food: For little ones who love pretend play, these can become part of a play kitchen collection.
- Wreath Embellishments: Attach them to a fall-themed wreath for a unique crafty accent.
- Coasters: If you make them flatter and smaller, they can even double as adorable coasters!
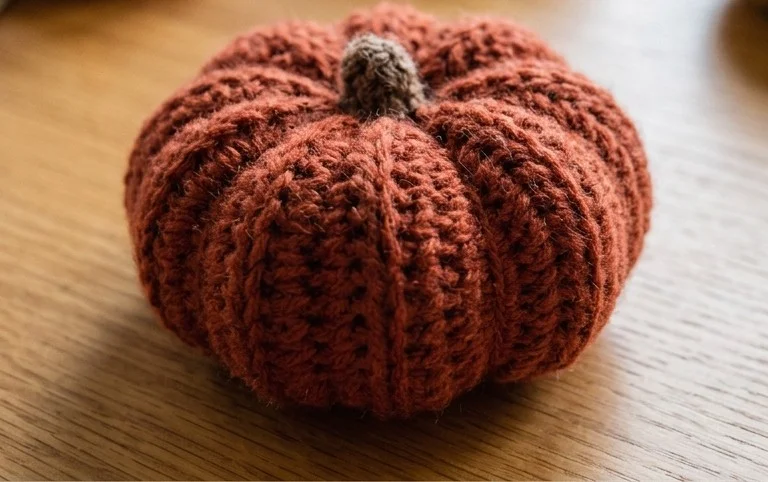
You’ve made a charming crochet pumpkin! Wasn’t that fun and fast? These little pumpkins are wonderful for filling bowls, dotting along shelves, or even as thoughtful, handmade gifts. They work up so quickly, you can tailor a whole set in different colors for any occasion or season. Consider experimenting with different yarn textures for a unique feel, or adding embroidery for facial features on a friendly gourd. If you share your creations on social media, tag us so we can see your adorable pumpkin patch! We love seeing what you make. Keep practicing these basic stitches, and soon you’ll be ready for more crochet projects. Browse our site for more beginner-friendly patterns!