This amigurumi pumpkin pattern is a perfect little project for autumn, bringing a cozy touch to your home. It works up quickly, making it ideal for craft fairs or as a thoughtful handmade gift. The texture from the stitches gives it a lovely, realistic feel, much like a miniature version of the real thing you might find at a local patch. Yarn and Hook Recommendations For this pumpkin, you’ll want to choose a yarn that has a nice matte finish and a good stitch definition. Worsted weight acrylic yarn is a fantastic choice. It’s readily available, comes in a wide array of colors, and is easy to care for. For a classic pumpkin look, shades of orange like rust, burnt orange, or even a deep pumpkin spice are excellent. For the stem, a brown or a dark green works well. You can also get creative with variegated yarns for a unique effect. Regarding the hook, a size 3.75mm (F-5) crochet hook is generally a good starting point for worsted weight yarn when making amigurumi. This size hook will create a dense fabric, which is essential for amigurumi so that the stuffing doesn’t show through the stitches. If you find your stitches are too loose, you can always go down a hook size, perhaps to a 3.5mm (E-4). Conversely, if your fabric feels too stiff and you’re having trouble making your stitches, try a slightly larger hook. Stitch Techniques Used This pattern relies on a few fundamental crochet stitches that are common in amigurumi. Mastering these will allow you to create this sweet pumpkin.
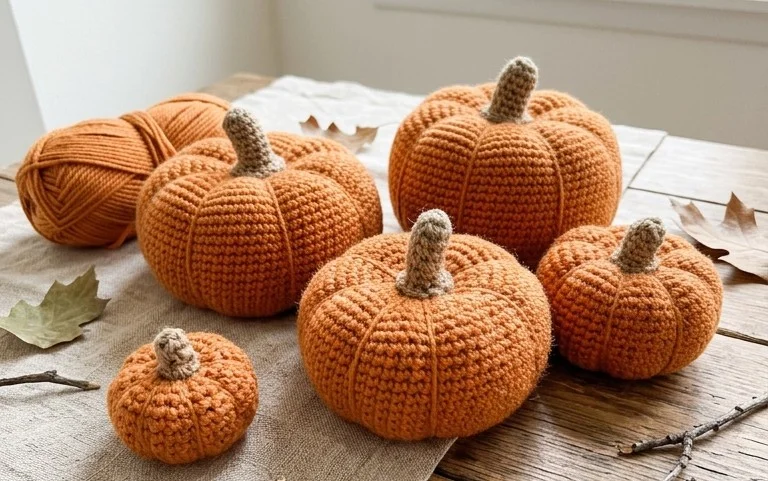
Amigurumi Beautiful Pumpkin Free Pattern
This amigurumi pumpkin pattern is a perfect little project for autumn, bringing a cozy touch to your home. It works up quickly, making it ideal for craft fairs or as a thoughtful handmade gift. The texture from the stitches gives it a lovely, realistic feel, much like a miniature version of the real thing you might find at a local patch.
Yarn and Hook Recommendations
For this pumpkin, you’ll want to choose a yarn that has a nice matte finish and a good stitch definition. Worsted weight acrylic yarn is a fantastic choice. It’s readily available, comes in a wide array of colors, and is easy to care for. For a classic pumpkin look, shades of orange like rust, burnt orange, or even a deep pumpkin spice are excellent. For the stem, a brown or a dark green works well. You can also get creative with variegated yarns for a unique effect.
Regarding the hook, a size 3.75mm (F-5) crochet hook is generally a good starting point for worsted weight yarn when making amigurumi. This size hook will create a dense fabric, which is essential for amigurumi so that the stuffing doesn’t show through the stitches. If you find your stitches are too loose, you can always go down a hook size, perhaps to a 3.5mm (E-4). Conversely, if your fabric feels too stiff and you’re having trouble making your stitches, try a slightly larger hook.
Stitch Techniques Used
This pattern relies on a few fundamental crochet stitches that are common in amigurumi. Mastering these will open the door to countless other stuffed toy projects.
- Magic Ring (or Magic Circle):
- Single Crochet (sc):
- Increase (inc):
- Decrease (dec):
- Slip Stitch (sl st):
Tips for Beginners
If you’re new to amigurumi, don’t worry! This pumpkin is a great project to build your confidence.
- Use a stitch marker: Amigurumi is worked in continuous rounds, meaning you don’t join at the end of each round. A stitch marker is your best friend to keep track of where each round begins. Place it in the first stitch of the round.
- Stuff as you go: Don’t wait until the very end to stuff your pumpkin. Begin stuffing when you’re about halfway done with the main body. Add stuffing gradually, ensuring an even distribution. You want it to be firm but not so tight that it distorts your stitches.
- Counting is key: Amigurumi patterns rely heavily on stitch counts. Double-check your count at the end of each round. It’s much easier to frog (undo) a few stitches than to unravel a whole section.
- Tension control: Try to maintain consistent tension throughout your work. This will result in an even fabric and a well-shaped pumpkin. If you tend to crochet loosely, consider going down a hook size.
- Weaving in ends: Once you’ve finished, weave in all your yarn tails securely. Thread the yarn onto a yarn needle and run it through several stitches in different directions. Trim any excess. This prevents your stuffing from escaping.
How to Customize
The beauty of amigurumi is how easily you can personalize your creations.
- Colors: Beyond the classic orange and brown, think outside the box! Try a pastel pumpkin for a whimsical look, or a variegated yarn for a more natural, textured appearance. You could even make a “patchwork” pumpkin by alternating colors every few rounds.
- Sizes: The size of your pumpkin is directly related to the yarn weight and hook size you use. To make a smaller pumpkin, use a lighter weight yarn (like sport weight or DK) and a smaller hook. For a larger pumpkin, use a bulkier yarn (like chunky or super bulky) and a larger hook. Ensure you adjust your stuffing amount accordingly.
- Details: Add embellishments like crocheted leaves, small embroidered vines, or even tiny buttons for a unique touch. You can also adjust the number of “segments” by strategically placing seams or adding a few extra stitches in certain rounds when you’re sewing it closed.
Care Instructions
Taking care of your amigurumi pumpkin is simple, but important to maintain its shape and appearance.
Most acrylic yarns are machine washable. You can typically wash your pumpkin on a gentle cycle with cool water. It’s best to place it inside a mesh laundry bag to protect it from snagging or getting misshapen. Avoid using bleach or harsh detergents. After washing, gently reshape the pumpkin and lay it flat to air dry. Do not put it in the dryer, as the heat can melt the acrylic fibers and ruin the stuffing.
Project Ideas
This cute little pumpkin is more than just a decoration. Here are a few ideas to spark your creativity:
- Fall Decor: Group several pumpkins of different sizes and shades together on a mantelpiece, shelf, or as a centerpiece for your dining table.
- Gift Toppers: Attach a small pumpkin to a gift basket or present for an extra festive touch during the autumn season.
- Playtime Pal: For slightly older children (ensure all safety features are securely attached if making for them), these pumpkins can be fun, soft toys for imaginative play.
- Halloween Goodies: Pair them with spooky amigurumi ghosts or bats for a delightful Halloween display.
- Keychains/Zipper Pulls: Use a smaller hook and thinner yarn to create miniature pumpkins that can be attached to bags or zippers.
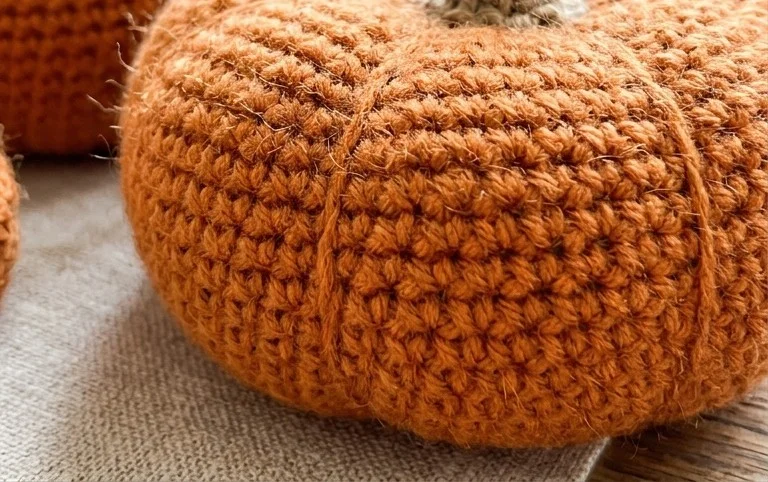
You’ve made it to the end of the Amigurumi Beautiful Pumpkin pattern! I hope you enjoyed crocheting this little squash. It really is a satisfying project, especially when you see that familiar pumpkin shape emerge. If you made yours with a special yarn or a unique color, I’d love to see it! Tag your finished pumpkin on social media so others can admire your work. Feel free to experiment with different sizes by adjusting your hook and yarn, or try adding embroidery for facial features if you’re feeling adventurous. More free patterns are always being added, so check back soon for your next crochet project.