A crocheted snail amigurumi makes for an absolutely adorable addition to any shelf, a perfect gift for a little one, or even a quirky desk companion. These little guys, with their distinctive swirled shells and gentle expressions, are surprisingly simple to create, making them a fantastic project for those new to amigurumi or even crochet in general. The beauty of a handmade amigurumi snail lies in its charming imperfections and the warmth of the yarn. You can have a whole family of snails in different colors and sizes, each with its own personality.
Yarn and Hook Recommendations For your snail amigurumi, a smooth worsted weight yarn is a great choice. It’s widely available, comes in a rainbow of colors, and works up at a good pace. Cotton or a cotton blend is ideal because it has a nice structure, which is important for amigurumi to hold its shape, and it’s washable. Acrylic yarn is also a budget-friendly option and comes in many shades. You’ll want to pick a main color for the snail’s body and a contrasting color for the shell. For a standard worsted weight yarn, a hook size between E/4 (3.5mm) and G/6 (4.0mm) is usually perfect. Using a hook slightly smaller than what the yarn label suggests will help create a tighter fabric, which prevents stuffing from peeking through, a common issue in amigurumi. If you’re aiming for a smaller snail, consider using a sport weight or DK weight yarn with a corresponding smaller hook, perhaps a B/1
This guide will walk you through creating your very own amigurumi snail, step-by-step. We’ll cover everything from choosing your yarn to stuffing and assembling your finished friend. Get ready to crochet a charming companion that’s as fun to make as it is to give!
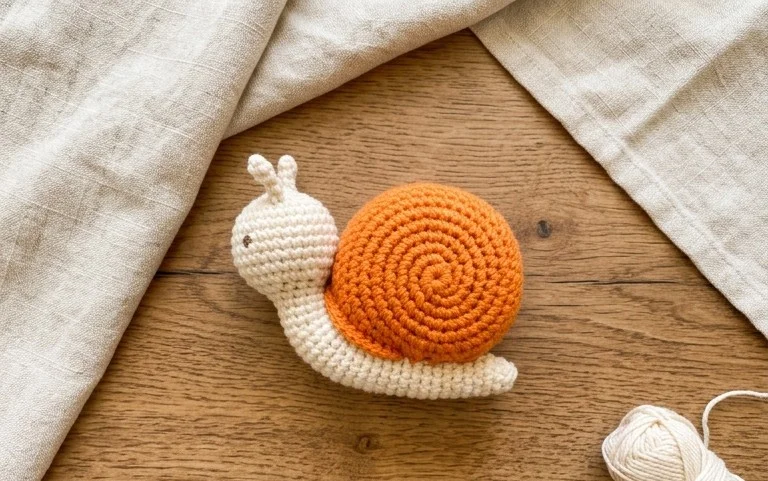
Crochet Snail Amigurumi Idea And Patterns
A crocheted snail amigurumi makes for an absolutely adorable addition to any shelf, a perfect gift for a little one, or even a quirky desk companion. These little guys, with their distinctive swirled shells and gentle expressions, are surprisingly simple to create, making them a fantastic project for those new to amigurumi or even crochet in general. The beauty of a handmade amigurumi snail lies in its charming imperfections and the warmth of the yarn. You can have a whole family of snails in different colors and sizes, each with its own personality.
Yarn and Hook Recommendations
For your snail amigurumi, a smooth worsted weight yarn is a great choice. It’s widely available, comes in a rainbow of colors, and works up at a good pace. Cotton or a cotton blend is ideal because it has a nice structure, which is important for amigurumi to hold its shape, and it’s washable. Acrylic yarn is also a budget-friendly option and comes in many shades. You’ll want to pick a main color for the snail’s body and a contrasting color for the shell. For a standard worsted weight yarn, a hook size between E/4 (3.5mm) and G/6 (4.0mm) is usually perfect. Using a hook slightly smaller than what the yarn label suggests will help create a tighter fabric, which prevents stuffing from peeking through, a common issue in amigurumi.
If you’re aiming for a smaller snail, consider using a sport weight or DK weight yarn with a corresponding smaller hook, perhaps a B/1 (2.25mm) or C/2 (2.75mm). For a larger, cuddlier snail, you could even experiment with bulky weight yarn and a larger hook, like an H/8 (5.0mm) or I/9 (5.5mm).
Essential Stitch Techniques
Creating a crochet snail amigurumi relies on a few fundamental crochet stitches that, once mastered, open up a world of amigurumi possibilities. The most important of these is the single crochet stitch. This is the backbone of most amigurumi patterns because it creates a dense, firm fabric. You’ll also need to know how to work in continuous rounds, meaning you crochet in a spiral without joining at the end of each round. This avoids a visible seam that you’d get if you joined and turned. For this, a stitch marker is absolutely indispensable to keep track of where each round begins.
Here are the key stitches and techniques you’ll encounter:
- Magic Ring (or Magic Circle): This is how you start most amigurumi pieces to create a tight, closed center without a hole. It’s a technique where you form a loop with your yarn, and then work your first round of stitches into that loop, pulling it closed afterward.
- Single Crochet (sc): As mentioned, this is your primary stitch for building the body and shell.
- Increase (inc): To make your piece larger, you’ll work two single crochet stitches into the same stitch from the previous round. This is typically done in specific locations to create shaping.
- Decrease (dec): To make your piece smaller, you’ll work two stitches together. The most common method for amigurumi is the “invisible decrease,” where you insert your hook into the front loops of the next two stitches, yarn over, pull up a loop, yarn over, and pull through both loops on your hook. This results in a less noticeable decrease than a standard one.
- Slip Stitch (sl st): Used to join rounds if you’re not working continuously, or to finish off a piece.
- Working in the Front Loop Only (FLO) or Back Loop Only (BLO): Sometimes patterns will instruct you to work only into one loop of the stitch. This can create interesting textures or allow for joining pieces seamlessly.
Tips for Beginners
If you’re new to amigurumi or crochet altogether, don’t be intimidated! These snails are a fantastic starting point. Here are some tips to make your experience smoother:
- Practice the Magic Ring: This can be tricky at first, but there are tons of great video tutorials online that break it down visually. Once you get it, it’s second nature.
- Count Your Stitches: Amigurumi relies on precise stitch counts. After each round, recount your stitches to ensure you haven’t missed any or added extra. A stray stitch can throw off the shape of your piece significantly.
- Stuffing Technique: Don’t overstuff, as this can distort the stitches and push the yarn apart. Start stuffing as you crochet, adding small amounts gradually. Use a stuffing tool or the blunt end of a crochet hook to push stuffing into smaller or tighter areas. You want the piece to be firm but still have a nice squish to it.
- Thread the Needle for Assembly: When sewing parts together (like the head to the body, or the shell to the body), use a yarn needle with a large eye. Make sure your yarn tail is long enough to comfortably sew the pieces.
- Safety Eyes: For the eyes, safety eyes are recommended for children’s toys. They have a post and a backing that locks securely. Ensure they are placed correctly before stuffing the head fully. If you’re making the snail for an adult or as a decorative item, you can also embroider the eyes with black embroidery floss.
How to Customize Your Snail
The real fun of crochet amigurumi is the endless potential for customization! Your snail can be as unique as you imagine.
Colors
The most obvious way to customize is with color. Don’t be afraid to mix and match!
- Shell Variations: Try stripes on the shell by changing yarn color every few rounds. You can also use ombre yarns for a gradient effect or even variegated yarns for a unique, multi-toned shell.
- Body Colors: Beyond traditional earthy tones, why not make a bright pink snail, a sky blue one, or even a rainbow-colored body?
- Details: Add little bows, tiny flowers, or contrasting spots to the body or shell for extra flair.
Sizes
Adjusting the size is straightforward and simply involves changing your yarn weight and hook size. As mentioned before:
- Smaller Snails: Use thinner yarn (sport weight, DK) and a smaller hook (2.0mm-3.0mm). These are great for keychains or as tiny accents.
- Larger Snails: Use thicker yarn (worsted, bulky, super bulky) and a larger hook (4.5mm-6.0mm). These make for cuddly companions.
- Pattern Adjustments: If you’re dramatically changing the size, you might need to adjust the number of rounds in the pattern to achieve a proportional shape, especially for the shell’s spiral.
Care Instructions for Your Finished Piece
Handmade amigurumi is a cherished item, and with a little care, it will last for years. For most cotton or acrylic yarns, hand washing is the best option.
- Hand Wash Gently: Fill a basin with cool water and a small amount of mild detergent. Submerge your snail and gently agitate the water. Avoid wringing or twisting, as this can distort the shape.
- Rinse Thoroughly: Drain the soapy water and refill with clean, cool water. Rinse until all soap residue is gone.
- Remove Excess Water: Gently squeeze out as much water as possible without stretching the yarn. You can also roll the snail in a clean, dry towel to absorb more moisture.
- Air Dry: Reshape your snail to its original form and lay it flat on a clean towel or drying rack. Keep it out of direct sunlight, which can fade colors. Never put amigurumi in a dryer, as the heat can melt synthetic fibers and shrink wool.
- For Toys with Safety Eyes: While hand washing is generally safe, you might want to place the snail inside a mesh laundry bag before washing to protect the eyes and any other embellishments.
Project Ideas
Beyond just making a single snail, this pattern can spark a lot of creative project ideas:
- Snail Mobile: Create several small snails and string them together with beads and other crochet shapes to make a whimsical mobile for a nursery.
- Keychain Charms: Use thinner yarn and a smaller hook to create tiny snails that can be attached to zippers, bags, or keys.
- Themed Sets: Crochet a little garden scene with mushrooms, flowers, and your snails. Or create a “slow down and enjoy” gift set with books and your snail.
- Party Favors: Make a batch of mini snails in fun colors for a child’s birthday party favor.
- Holiday Decorations: With a few color changes, you can adapt your snail for different holidays – think red and green for Christmas, or pastels for Easter.
The crochet snail amigurumi is a project that offers both satisfaction in creation and joy in the finished product. Its simple form lends itself beautifully to endless creative interpretations.
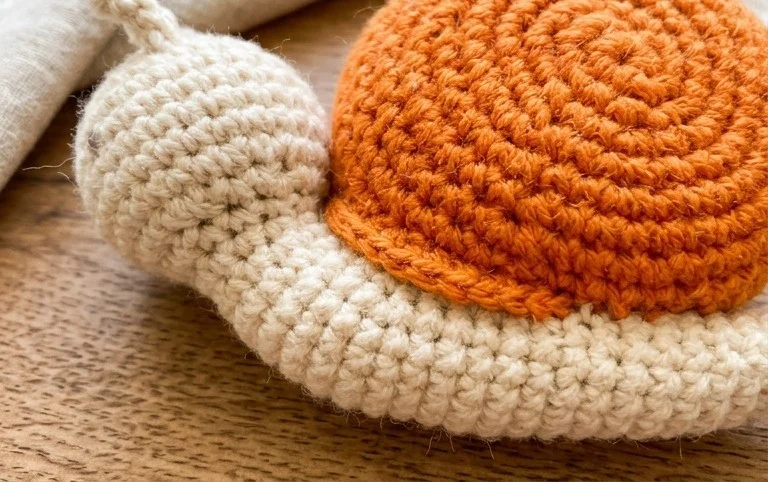
There you have it – your very own amigurumi snail, ready to bring a smile to anyone’s face. I hope you enjoyed this pattern and the process of bringing this little creature to life with your hook. Don’t be afraid to experiment with different yarn colors for the body and shell; maybe you’ll create a rainbow snail or one with a patterned shell! Consider adding safety eyes for a classic amigurumi look, or embroidering eyes for a softer feel. If you share your finished snail on social media, please tag us – we’d love to see your creations! Keep your hooks busy, and don’t forget to check out more fun crochet patterns here.
Making these little snails is a wonderful way to use up scrap yarn, and they work up so quickly that you can make a whole collection for a baby shower gift or for your own home decor. Remember, the joy is in the making, and each snail will be unique. Enjoy your crochet journey!