A crochet rose blooming from a tight spiral is a charming little project. It’s a classic shape that looks like it took ages, but once you get the hang of the spiral, you can whip these up quickly. They’re the kind of detail that can really bring a crochet project to life, adding a handmade touch that store-bought embellishments just can’t match. Think about adding one to a hat, a scarf, or even a cozy blanket. This pattern is straightforward, making it a great way to practice some fundamental crochet stitches. Yarn and Hook Recommendations For this Spiral Rose, you’ll want a yarn that has a nice drape and shows off the texture well. Cotton yarns are excellent choices because they have a bit of crispness that helps the stitches stand out, and they don’t stretch out of shape easily. Worsted weight cotton is a good go-to for a medium-sized rose. If you want a daintier flower, try a sport weight or even a fingering weight cotton. For a larger, more substantial bloom, a bulky weight yarn will work up quickly and create a dramatic effect. The hook size is directly related to your yarn choice. The general rule is to go with the hook size recommended on your yarn label. However, for amigurumi or decorative pieces like this rose, many makers prefer to go down a hook size from the recommendation. This creates a tighter fabric, preventing any stuffing from showing through and giving the finished rose a more defined shape. For worsted weight cotton, a 4.0mm hook is often a good starting point, but adjust as needed.
The construction of this rose is simpler than it looks. You’ll be working in continuous rounds, creating the petals by working into the back loops and then gently curling them around. We’ll cover how to start the spiral base, how to create the graduated stitches that form the petals, and how to finish off neatly. You’ll learn a technique that uses simple increases and decreases to build the three-dimensional shape. This makes it a perfect project for someone who knows basic stitches like single crochet and double crochet but wants to try something a bit more decorative. You’ll be amazed at how these humble stitches transform into a beautiful, textured rose.
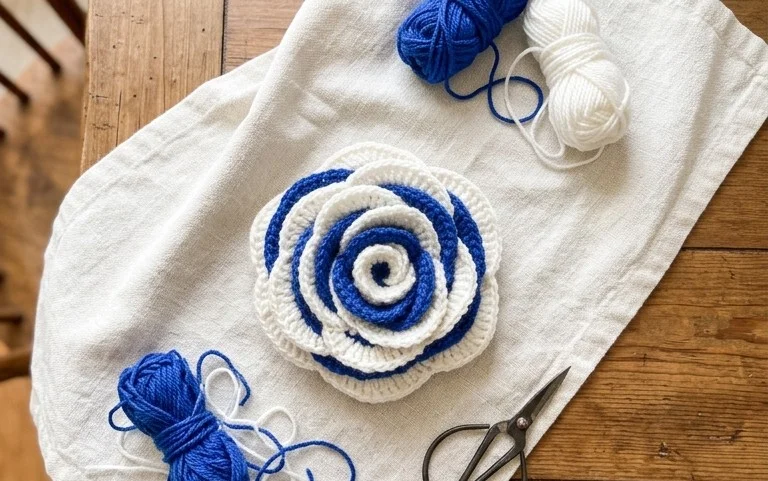
The Spiral Rose Crochet Flower
A crochet rose blooming from a tight spiral is a charming little project. It’s a classic shape that looks like it took ages, but once you get the hang of the spiral, you can whip these up quickly. They’re the kind of detail that can really bring a crochet project to life, adding a handmade touch that store-bought embellishments just can’t match. Think about adding one to a hat, a scarf, or even a cozy blanket. This pattern is straightforward, making it a great way to practice some fundamental crochet stitches.
Yarn and Hook Recommendations
For this Spiral Rose, you’ll want a yarn that has a nice drape and shows off the texture well. Cotton yarns are excellent choices because they have a bit of crispness that helps the stitches stand out, and they don’t stretch out of shape easily. Worsted weight cotton is a good go-to for a medium-sized rose. If you want a daintier flower, try a sport weight or even a fingering weight cotton. For a larger, more substantial bloom, a bulky weight yarn will work up quickly and create a dramatic effect.
The hook size is directly related to your yarn choice. The general rule is to go with the hook size recommended on your yarn label. However, for amigurumi or decorative pieces like this rose, many makers prefer to go down a hook size from the recommendation. This creates a tighter fabric, preventing any stuffing from showing through and giving the finished rose a more defined shape. For worsted weight cotton, a 4.0mm (G/6) or even a 3.75mm (F/5) hook is a good starting point. For sport weight, a 2.5mm or 3.0mm hook might be best. Experiment a little to see what gives you the look you prefer.
Stitch Techniques Used
The Spiral Rose is built on a few core crochet stitches. The foundation is usually a magic ring, which creates a closed, neat center for your spiral. If a magic ring feels tricky at first, you can substitute it with a chain-2 and then working your stitches into the first chain.
- Single Crochet (sc): This is the most common stitch in this pattern. It creates a dense fabric, which is perfect for a flower that needs to hold its shape. You’ll be working in continuous rounds, meaning you won’t join your rounds with a slip stitch and chain up.
- Increase (inc): To make the rose spiral outwards, you’ll need to increase the number of stitches in each round. An increase typically means working two single crochets into the same stitch from the previous round.
- Optional: Half Double Crochet (hdc) or Double Crochet (dc): Some variations of the spiral rose might incorporate taller stitches in later rounds to create wider petals. If you decide to experiment with different sizes or textures, these stitches can be very useful. For the basic spiral rose, single crochet is usually sufficient.
The key to the spiral effect is working in continuous rounds. This means that as you crochet, your work will naturally begin to coil and form a spiral shape without you having to do anything special to create the curve. It’s a really satisfying technique.
Tips for Beginners
If you’re new to crochet, or new to working in continuous rounds, don’t worry! This project is a fantastic way to build confidence. The most important tip for continuous rounds is to use a stitch marker. Place this marker in the first stitch of each round. When you come back around, you’ll know exactly where the round begins and ends. Without it, it’s easy to lose your place and end up with a wonky shape.
Another common stumbling block for beginners is tension. If your stitches are too tight, it will be hard to insert your hook. If they’re too loose, the fabric might be gappy. Try to keep your tension as consistent as possible. Practice a few rows of single crochet before starting the rose itself. This will help you get a feel for the yarn and hook.
Don’t be discouraged if your first few roses aren’t perfect. Crochet takes practice. The beauty of this project is that even a slightly imperfect rose is still a charming rose! You can always unravel and try again. Pay close attention to counting your stitches in each round, especially when you’re increasing. An incorrect stitch count is the most common reason for a spiral that doesn’t form correctly.
How to Customize (Colors, Sizes)
The Spiral Rose is incredibly adaptable. Changing the yarn weight and hook size is the easiest way to alter the size. As mentioned, a thicker yarn with a larger hook will make a bigger rose, and a thinner yarn with a smaller hook will make a smaller one. You can easily make a whole bouquet of roses in varying sizes this way.
Color is where you can really have some fun. The classic rose has a pink or red center, but there are no rules here!
- Classic: Red, pink, or burgundy yarn for the petals. Use green yarn for the stem if you plan to add one.
- Modern: Try ombre yarns that change color as you work, or choose unexpected colors like teal, purple, or even black for a dramatic statement.
- Multicolor: You can change colors mid-rose. For example, start with a dark red and switch to a lighter pink in the last few rounds for a layered effect. Or, work a few rounds of green for a leafy base before starting the petal spiral.
If you want to make your rose even more detailed, consider adding a stem. This is usually made by crocheting a chain in green yarn and then single crocheting back along the chain. You can also add small crochet leaves attached to the stem.
Care Instructions for the Finished Piece
Crocheted items, especially those made with cotton, are generally quite durable. For your Spiral Roses, especially if they are embellishments on other items, a gentle hand wash is best.
- Fill a basin or sink with cool water.
- Add a small amount of mild detergent (like wool wash or even gentle dish soap).
- Submerge the rose and gently swish it around. Avoid wringing or stretching it vigorously.
- Rinse thoroughly with cool, clean water until all soap is gone.
- Gently squeeze out excess water. Do not wring.
- Lay the rose flat on a clean towel. Roll the rose up in the towel to absorb more moisture.
- Reshape the rose to its original form and lay it flat on a dry towel or a mesh drying rack to air dry completely.
Avoid using a machine dryer, as the heat can damage the fibers and cause the rose to lose its shape. If the rose gets a little misshapen during washing, you can gently steam block it to restore its form, but be very careful not to over-steam or stretch it.
Project Ideas
These little Spiral Roses are so versatile, they can be used in countless projects:
- Appliqués: Sew or crochet them onto the front of a knitted or crocheted hat, scarf, sweater, or bag.
- Garlands: Make a bunch of roses in coordinating colors and string them together to create a beautiful floral garland for decorating a room or a party.
- Brooches: Attach a safety pin to the back of a slightly stiffer rose (perhaps worked with a smaller hook) to create a unique handmade brooch.
- Home Decor: Glue them onto picture frames, vases, or even use them to embellish throw pillows.
- Gift Toppers: Instead of a bow, tie a crochet rose onto a gift package for an extra special touch.
- Amigurumi Bouquet: Combine several roses with crochet leaves and stems to create a permanent, handmade bouquet that never needs watering.
- Jewelry: Small, tightly worked roses can be turned into charming earrings or pendants.
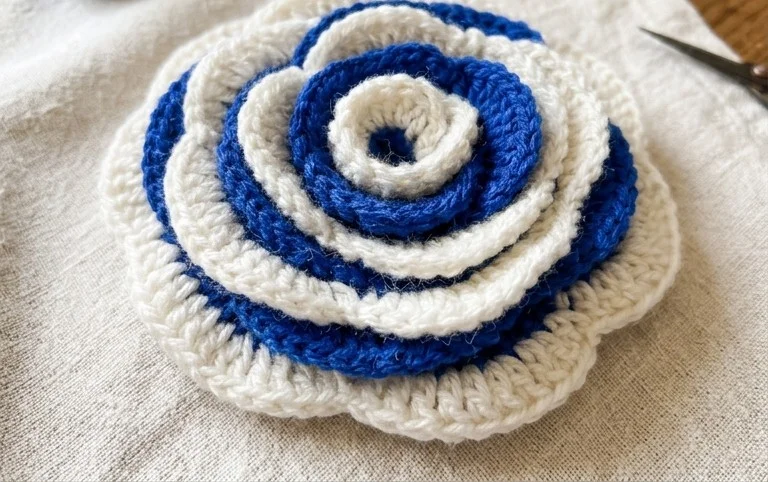
There you have it – a beautiful spiral rose crochet pattern that’s surprisingly quick once you get into the rhythm. These little flowers are so versatile; imagine them as appliques on bags, as charming gift toppers, or even clustered together for a unique wall hanging. If you’re feeling adventurous, try using variegated yarn for a multi-toned bloom, or experiment with different hook sizes to alter the petal texture. Don’t forget to share your finished spiral roses! Tag us on social media so we can see your creations – we love seeing how you bring these patterns to life. Keep an eye out for more crochet projects coming soon!